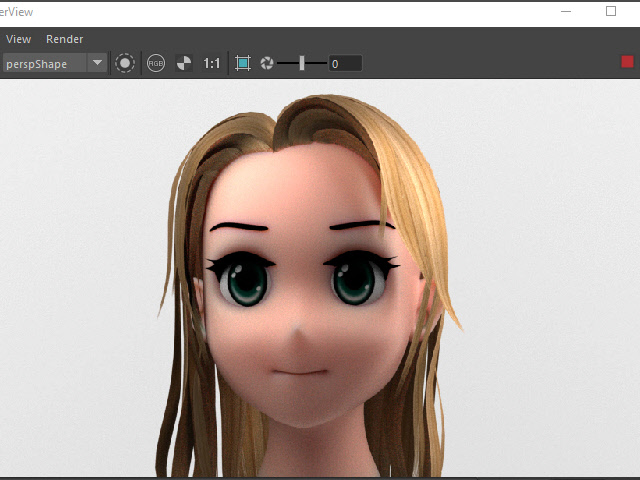
4. Transparency Map

1.
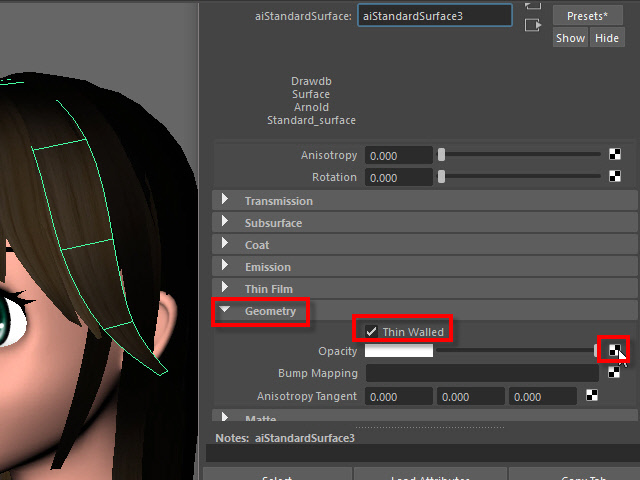
Apply Transparency map here.
Turn on Thin Walled to avoid too much refraction.
2.
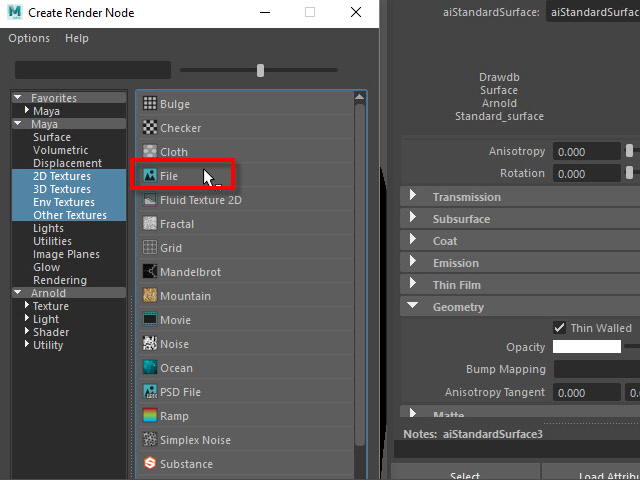
3.
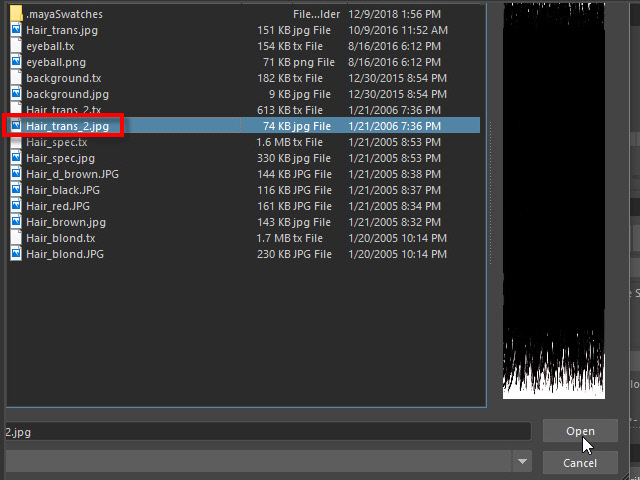
4.
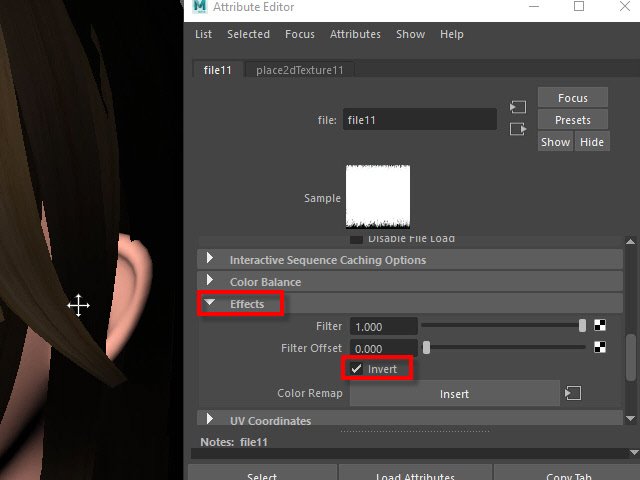
Invert a texture if needed.
5.
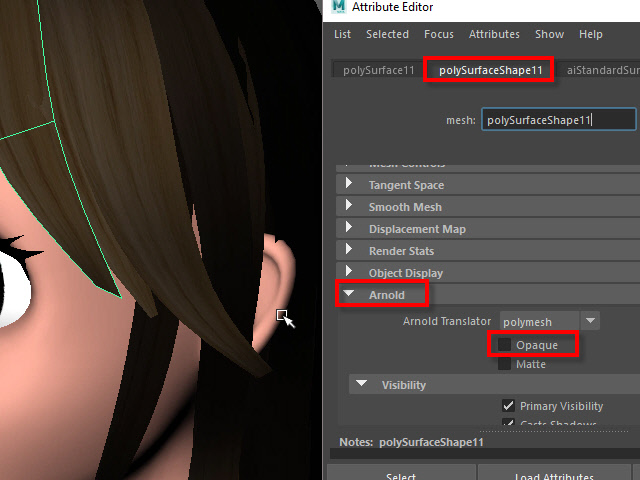
Select a hair piece and turn off Opaque otherwise, transparent doesn't work.
You have to do this for all hair pieces.
6.
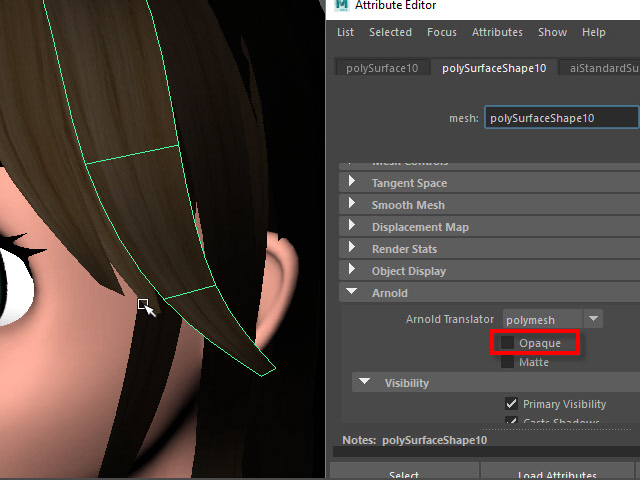
You have to do this for all hair pieces.
7.
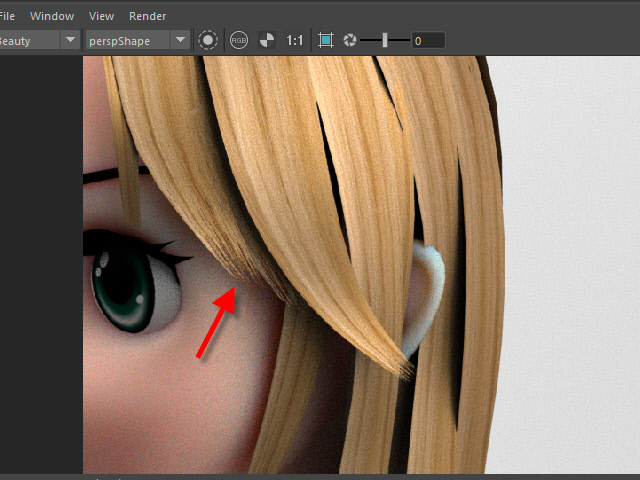
Rernder the image. Now transparent works.
8.
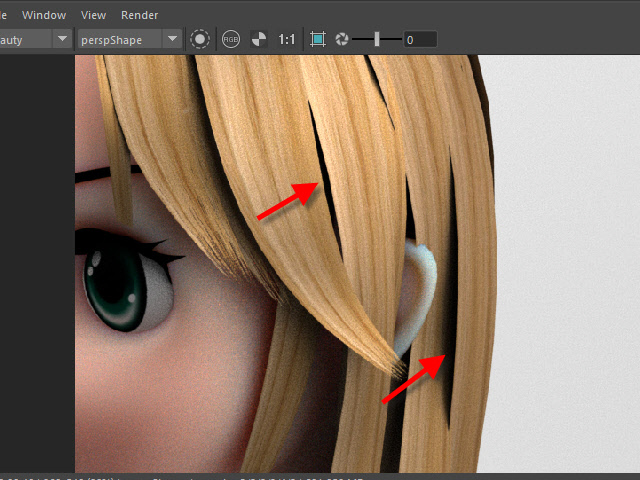
I don't like cast shadows on the hair so I am going to turn off the cast shadow option.
9.
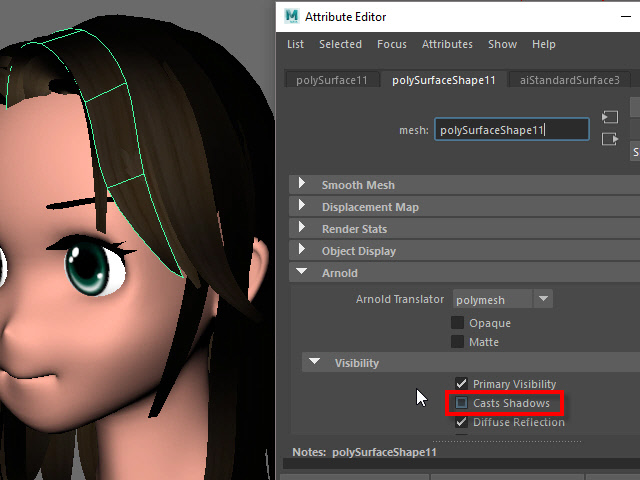
Select a hair piece and turn off Cast Shadows.
10.
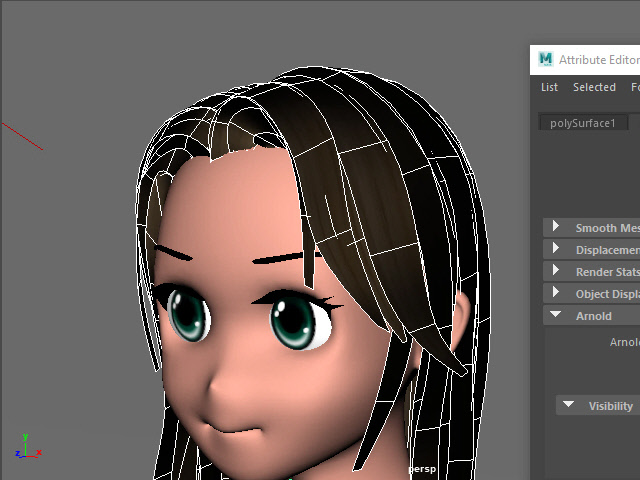
I will show you how to turn off all Cast Shadows at once.
11.
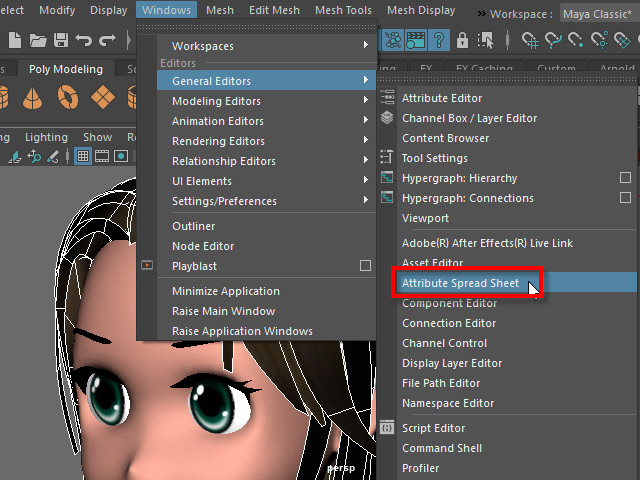
Select all hair pieces. Go to Attribute Spread Sheet.
12.
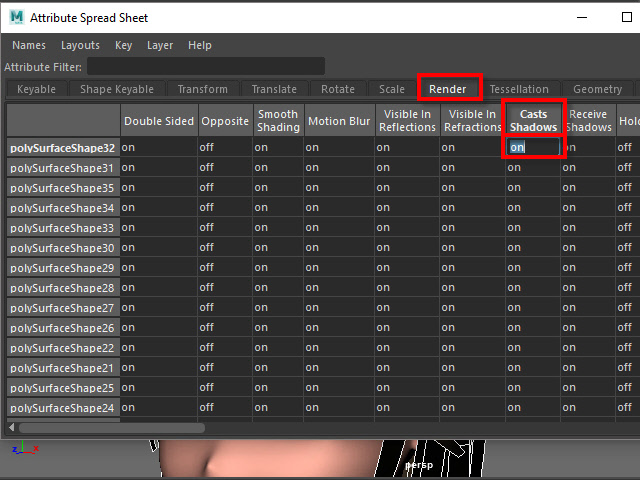
Find Cast Shadows menu. Select the first hair piece.
13.
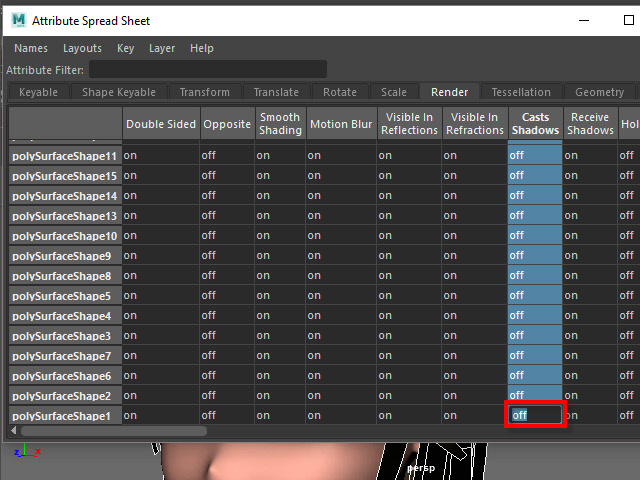
Hold Shift Key and select the last hair piece.
Turn off the last piece. It will chane all of them.
14.
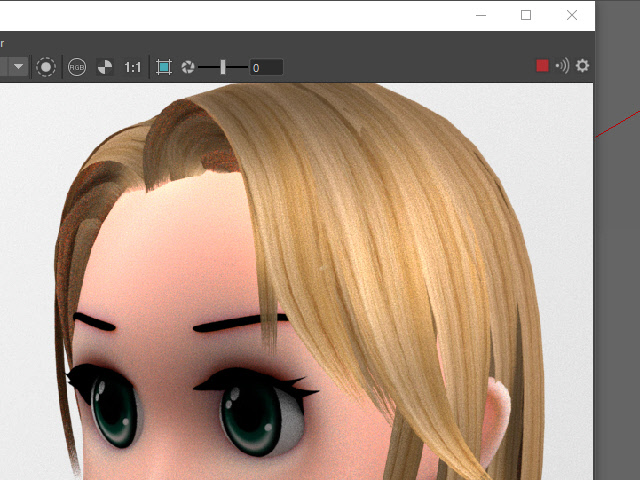
This is the rendered image.
15.
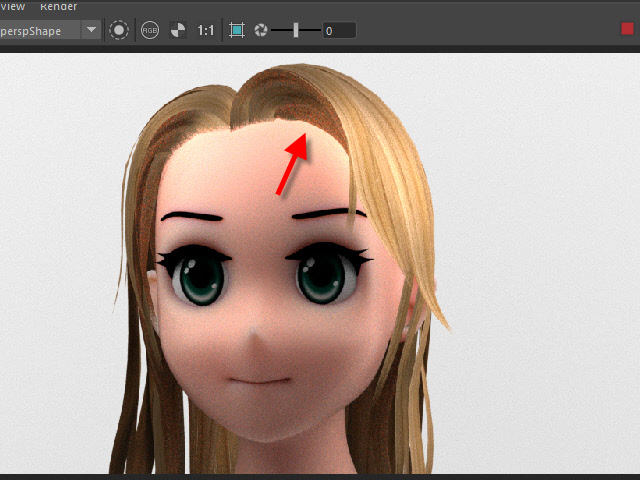
The forehead needs a cast shadow.
16.
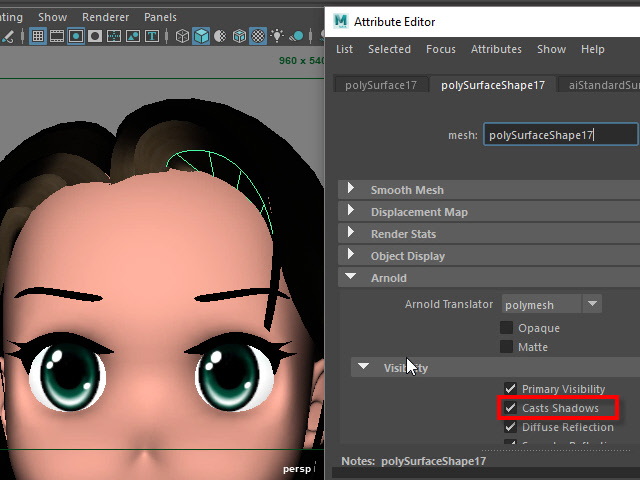
Select the all front hair pieces and turned off the Cast Shadows.
17.
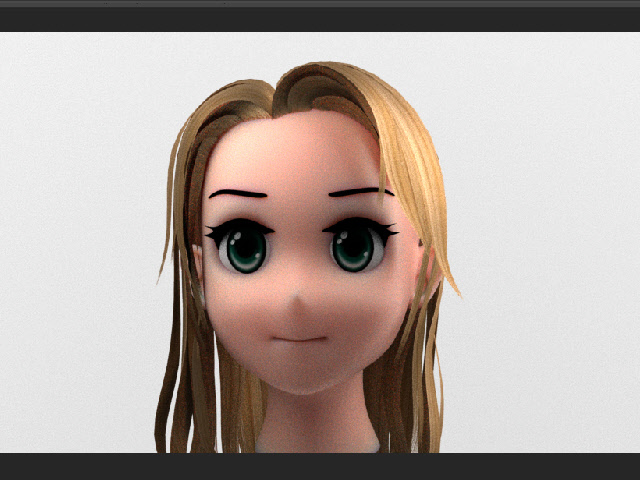
This is the rendered image. Compare to the image 15.
18.
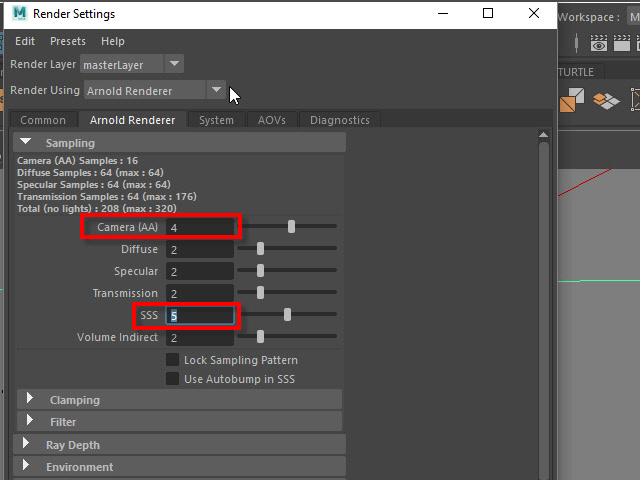
For the final rendering, turn up the Sampling for the better quality.
19.
